How to Start a Worm Composting Bin
This post may contain affiliate links, which means that I may receive a commission if you make a purchase using these links. As an Amazon Associate I earn from qualifying purchases.
Discover the eco-friendly way to dispose of kitchen scraps and yard waste with worm composting. Learn how to start a vermicomposting bin and create a nutrient-rich soil amendment for your garden.
This detailed guide will take you through setting up and maintaining a worm composter, from assembling the necessary materials to troubleshooting common issues. Get ready to explore the world of vermicomposting and learn how to utilize nature’s decomposers for a more sustainable home and garden.
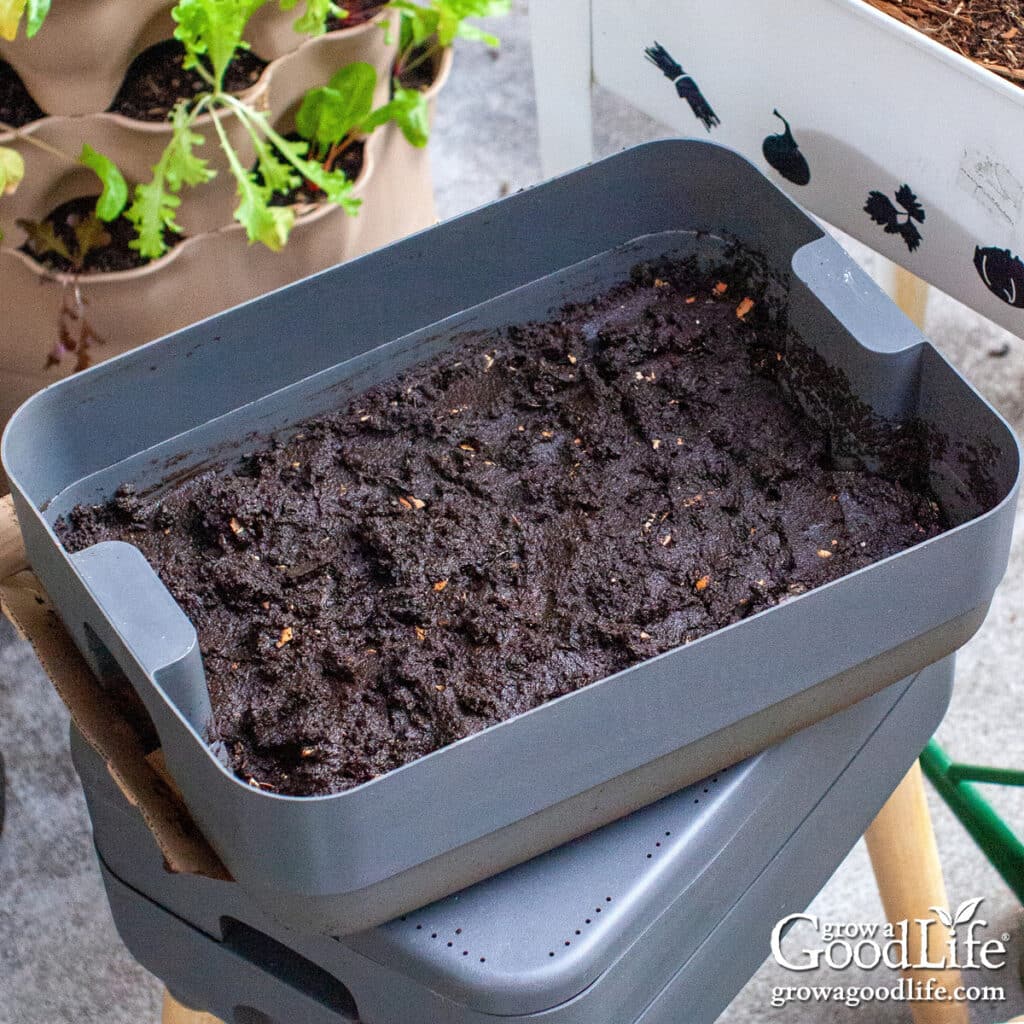
When I was a child, I loved fishing. In summer, when I was not tossing a line in the lakes, streams, and rivers around us I was often thinking about fishing. I wanted to be ready whenever my parents gave me the order to get in the car to visit friends or family. There was always a good fishing spot near the summer camps and cottages my family visited. So I wanted to be prepared. I made sure my rod had plenty of line and my tackle box was stocked up with hooks, sinkers, and bobbins.
I also kept a worm farm so I could scoop out worms and soil into a small coffee can to use as fishing bait.
I dug the worms from our vegetable garden and kept them in an old insulated galvanized milk box that I kept under the porch stairs, where it was cool all summer long. I would feed the worms with kitchen scraps, newspaper strips, coffee grounds, and a sprinkle of water whenever the soil looked dry.
When I needed worms, I would carefully dig in with my hands so as not to damage the worms, and scoop out enough for my fishing adventure of the day. I’d place the worms and soil into a metal coffee can with holes punched in the lid or a worm container that I wore on my belt when hiking along streams and brooks in the woods.
At the end of summer, I would empty the bin back into the garden, setting the healthy worms free to burrow beneath the soil for winter so I could dig them up again the following year.
I was amused when I learned later in life that what I was doing was vermicomposting and that the compost the worms produced was gardening gold.
Worm Bin Composters: An Eco-Friendly Way to Recycle Food Waste
Beginning a worm composting system, commonly known as vermicomposting, is an environmentally sustainable way to dispose of kitchen scraps and yard waste while producing an exceptionally nutrient-rich soil amendment for your garden.
Composting with worms, specifically red wigglers (Eisenia fetida), is an efficient way to break down organic waste materials that would otherwise end up in landfills. Vermicomposting is the process in which the worms consume and digest the organic waste, producing nutrient-rich compost, also known as black gold. Worm castings contain higher levels of essential nutrients, beneficial microbes, fungi, and bacteria than traditional compost piles, and are a valuable source of organic fertilizer for your plants.
Tools and Materials for Your DIY Worm Farm
Compared to traditional backyard compost heaps, the system requires very little space and maintenance. You can invest in a multi-tray vermicomposting bin such as this Eartheasy Dual Tray Worm Composter.
However, putting together a thriving worm composting setup is relatively simple if you follow some basic guidelines. Before getting started, you’ll need to collect the following tools and materials:
- Container: Many types of containers can accommodate a worm composting operation, including plastic storage bins, wooden boxes, and even old barrels cut in half. The container should be around 12 inches deep so the worms receive enough oxygen and include a cover for shade and protection from rain. Plan on about one square foot of surface area per pound of weekly food waste.
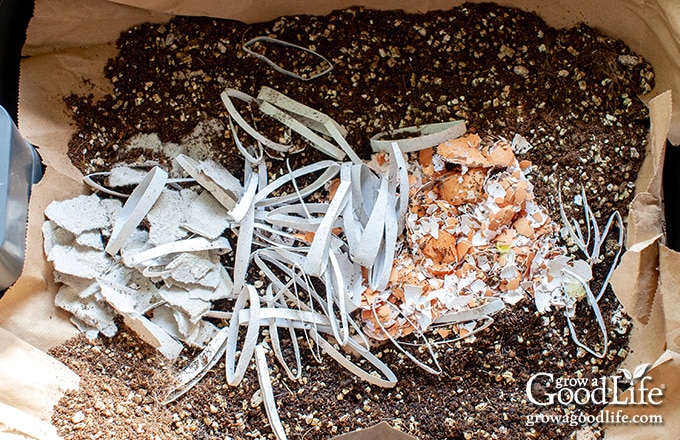
- Bedding: Bedding provides moisture retention, aerates the bin, and gives worms material to tunnel through. Viable options include gardening soil, shredded cardboard, coconut coir, leaves, straw, newspaper strips, or a mixture of materials. Avoid glossy paper and peat moss potting mixes that may contain fertilizers.
- Red wiggler worms: Red worms, also called Tiger worms available for purchase by the pound at many garden stores or online, are specially adapted to feast on decomposing organic matter in compost quickly and thrive in containers. They are surface feeders that create intricate tunnels and speed the rate of decomposition. You’ll need a half pound to a pound to get started.
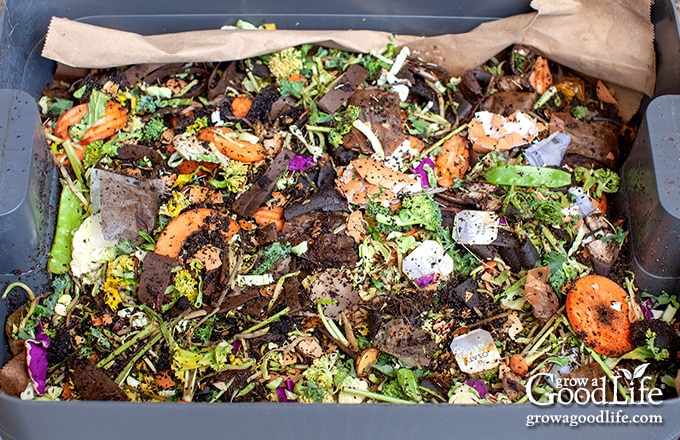
- Kitchen scraps: Fruit and vegetable peels and trimmings, crushed eggshells, coffee grounds, and tea bags all make excellent worm food. Avoid using meat trimmings, bones, dairy products, oils, and processed foods.
- Garden waste: You can include plant debris, leaves, and grass clippings in moderation. Chop or shred large pieces. Avoid diseased plants or those treated with chemicals.
- Gardening hand tools: A hand trowel, fork, or rake allows you to dig and periodically turn and aerate materials in the worm bin.
Preparing the Worm Composting System
Choosing a sheltered spot close to your kitchen for collecting food waste will make the composting process more convenient. Worms thrive in temperatures between 55°F and 77°F (13°C to 25°C). If you live in a climate with extreme temperatures, consider placing your bin where it’s protected from direct sunlight and insulated from cold or heat. Follow these basic steps to prepare your bin.
- Thoroughly clean, then drill 8 to 12 holes near the top rim and evenly spaced over the bottom of the plastic storage bin or wooden container. The ventilation holes are essential for air circulation, and the drainage holes allow excess moisture to drain.
- Line the bottom of the container with newspaper or a piece of old burlap bag to block worms from escaping while permitting excess moisture to drain away.
- Fill the container with loosely packed bedding material like shredded newspaper or cardboard to a depth of 8 to 10 inches, fluffing as you add layers. Then sprinkle a shovelful of garden soil over the bedding. The bedding provides initial food for the worms until you begin adding scraps.
- Place the container in a tray to collect any excess liquid that drains out and use it to water your plants.
- Add a little bit of water to moisten the bedding and let it absorb evenly. You want the moisture level to be like a damp sponge – not dripping wet, but not too dry.
Introducing the Worms
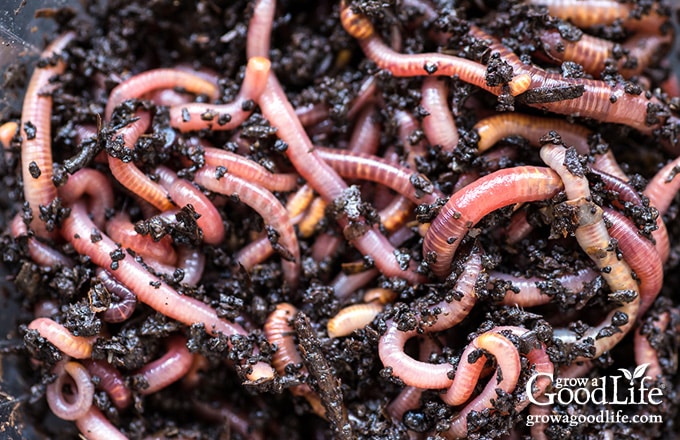
You can purchase red wiggler worms from garden centers or nurseries, often sold by the pound or packed in starter kits along with bedding material. For a small household compost bin, start with one pound of worms – that’s about 500 to 1000 red wigglers.
Be sure to have your worm bin set up and adequate bedding material in place before adding your starter worms, so they have space to tunnel and take cover. Gently place them into the fresh bedding, then let them acclimate for a few days before adding food waste.
Resist the urge to dig around and check on them. Eventually, the worms will completely transform the bedding and food scraps into dark, crumbly worm castings.
Feeding Your Worm Herd
As the worm population grows, so will their consumption rate. The amount of food waste you can add depends on the amount of worms in your bin and environment.
Start slowly with just a few vegetable scraps pushed below the surface every few days. Burying the waste prevents fruit flies and odors. The worms will gradually consume the bedding as food before moving on to the buried scraps. Their feeding rates will increase over time. Add more carbon bedding material as it is used up to maintain a healthy balance.
You’ll get a better sense of how much and how often to feed by observing worm activity and monitoring bin conditions. Indications it’s getting overloaded include slow decomposition, odors, insects like little white worms or centipedes, or worms attempting to escape. Avoid overfeeding by only adding scraps as prior food gets consumed. Eventually, you will learn the amount of food scraps to feed your bin.
Adding a Diverse Diet
Like other living organisms, worms crave a varied diet to stay healthy. Rotate different types of vegetable and fruit trimmings. Crush eggshells–an exceptional source of gritty calcium for earthworms–and mix in occasionally. Well-drained coffee grounds and tea leaves also make tasty worm cuisine. Limit citrus fruit and onion due to higher acidity.
Many find keeping a small container on the kitchen counter or under the sink makes collecting vegetable or fruit remnants quick and convenient before transfer to the outdoor worm composting bin. Just be sure not to put anything in there with animal products or oils that could cause odors or contamination before the material gets added to the worm bin
Maintaining Optimal Conditions
Red wigglers thrive best in temperatures between 55°F and 77°F (13°C to 25°C), with moisture levels like a damp sponge. Avoid letting the bin ingredients get too dry or soak completely through. During hot summer months, you may need to add water occasionally by spraying or sprinkling–about as much as the bedding can absorb.
Position some sort of cover or lid over the container to conserve moisture and provide shade. In winter months, situate containers in a sheltered garage or basement to protect worms if you live where it snows.
Getting oxygen to the worms is also essential for maintaining a healthy population. Every couple of weeks, gently fluff up bin contents down to lower layers using your long-handled pitchfork or a garden fork, moving materials from the side to the middle and vice versa. This prevents densely packed sections and allows air to permeate. Eventually, worms will completely process the bedding layer into nutrient-packed castings.
Harvesting the Worm Castings
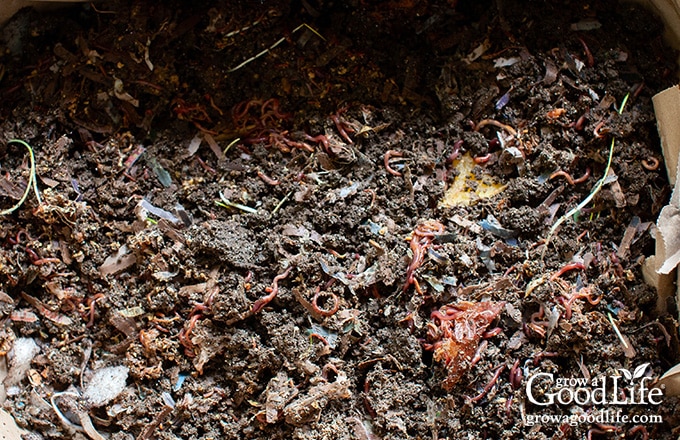
Within three to six months from setting up your worm composting bin and regularly feeding, the worms will transform most scraps, debris, and bedding into crumbly dark castings. Decomposed food and bedding collects in the bottom portion, while worms stay closer to fresher debris on top. At this point, it’s time to extract the worm castings.
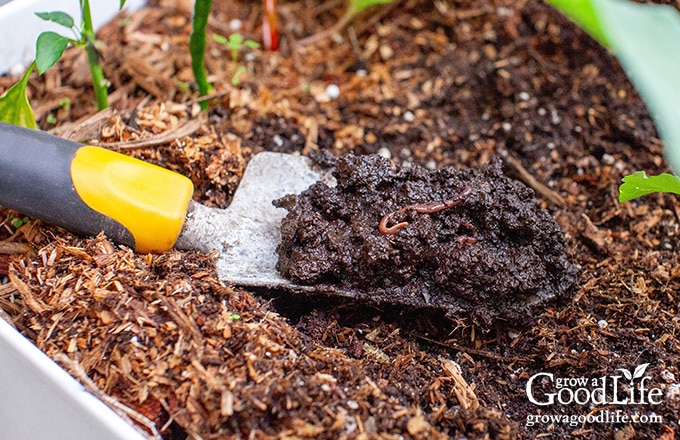
To harvest, push the bedding and food scraps over to one side, wait 15 minutes for worms to migrate away, then rake off the finished compost from the other side with a trowel or small rake. This nutrient-rich vermicompost, which looks like dark coffee grounds when finished, is excellent for feeding your vegetable garden plants, mixing into potting soil, or making a worm tea liquid fertilizer.
Troubleshooting Your Worm Compost Bin
Even well-maintained worm composting systems can run into occasional problems. Here are some common issues and ways to remedy them:
- Condensation and Odors: Improve air circulation through added holes or spacer blocks under the lid. Avoid overfeeding. Turn and fluff up material routinely.
- Mold: Cut back on moisture and acidity by reducing the amount of coffee grounds or citrus scraps used.
- Worms Attempting to Escape: Conditions have likely become inhospitable. This could mean it’s overly wet, dry, starved of oxygen, or depleted of food resources. Make adjustments accordingly in moisture, aeration, and available organic matter.
- Pests: Drain gnats and fruit flies indicate excess moisture. Ants invade if the contents are too dry or when citrus peel gets left too long. Remove citrus immediately after use.
While worm bin composters reduce kitchen waste going to the landfill, over time, a thriving DIY worm farm creates a sustainable closed-loop system right in your backyard. Worms can help you reduce your environmental footprint by composting kitchen scraps. In return, their nutrient-packed castings will fertilize your garden beds or containers where more fresh produce gets grown, harvested, and once again returned to the worms…and the cycle continues!
Good planning is key to a successful vegetable garden
Whether you are new to growing your own food or have been growing a vegetable garden for years, you will benefit from some planning each year. You will find everything you need to organize and plan your vegetable garden in my PDF eBook, Grow a Good Life Guide to Planning Your Vegetable Garden.

