Granny’s Bread and Butter Pickles Recipe
This post may contain affiliate links, which means that I may receive a commission if you make a purchase using these links. As an Amazon Associate I earn from qualifying purchases.
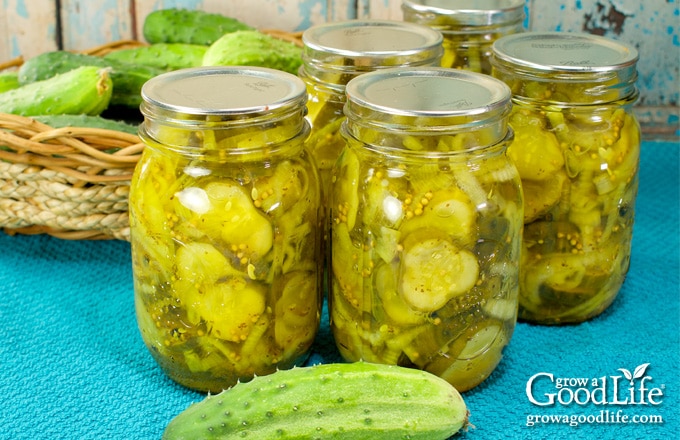
These old-fashioned bread and butter pickles have a crisp texture and a balanced sweet and sour flavor. The slightly sweet tangy flavor makes them perfect for topping your favorite burgers and sandwiches.
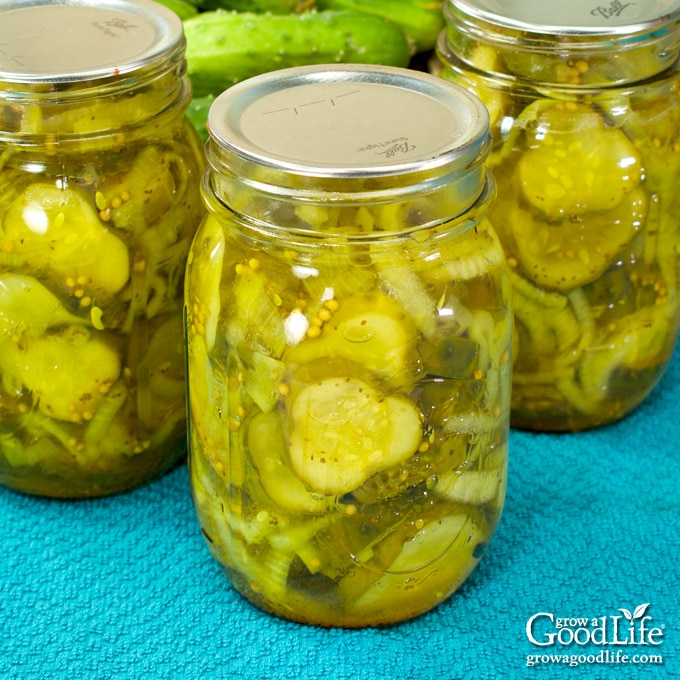
“I love pickles!” my husband said as I planned the garden soon after moving to our property.
With this in mind, I planned on growing a bunch of pickling cucumbers. I was not a fan of pickles, so normally I grew only a few cucumber plants to eat fresh and in salads. However, this was the year I acquired a lot of canning jars, and I was determined to fill each one with garden grown goodness.
Cucumbers ended up exceeding my expectations that year and were my most prolific producers. I barely kept up with processing them into endless batches of pickles. I made bread and butter pickles, kosher dill pickle spears and sweet pickle relish from the Ball Blue Book Guide to Preserving.
Soon my shelves were filled with jars and jars of pickles. We had so many pickles that I began asking my husband if he wanted pickles with almost meal. I gave jars of pickles and relish away and still had shelves full years later.
Thankfully, I learned my lesson and now only plant just a few cucumber plants to provide enough for fresh eating and a few batches of canned pickles and relish.
I have never been a big fan of pickles until I tried this recipe from a dear friend who was like a Granny to many. I call this recipe Granny’s Bread and Butter Pickles in her honor.
Tips for Canning Bread & Butter Pickles
These old-fashioned bread and butter pickles are made from cucumbers, onions and pickling spices. They are tangy, sweet, and crunchy—a perfect addition to any sandwich, hamburger, or hot dog. Here are tips for home canning bread and butter pickles:
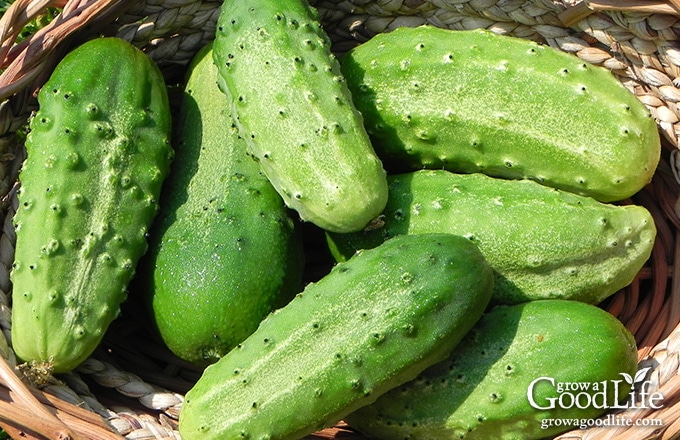
Select crisp, freshly harvested pickling cucumbers
Pickling cucumbers are short, thin skinned cucumbers that are primarily used for processing or pickling. Skip the waxed cucumbers at the grocery store. The wax prevents the pickling liquid from penetrating the cucumber.
Use pickling salt
Table salt contains iodine and anti-caking agents that can darken pickles and cause cloudiness in your jars. Instead, use pickling salt, which is also called canning salt.
Use commercial vinegar with at least 5% acidity
- Apple cider vinegar is made from fermented apples. It will darken your pickles slightly, but adds a nice flavor.
- White vinegar is clear vinegar made by distilling corn and rye. Choose an organic brand to avoid genetically modified corn.
Steps for Canning Pickles
If you are new to canning or haven’t canned in a while, it may be helpful to review this article on water bath canning at the National Center for Home Food Preservation website.
A more detailed and printable recipe can be found at the bottom of this article, but these are the general steps for making and canning bread and butter pickles:
Step 1: Gather your canning equipment
- Water bath canner with canning rack
- 5 pint sized canning jars
- Lids and bands (new lids for each jar, bands can be reused)
- Canning tools: jar lifter, canning ladle, funnel, and bubble popper
- Plus basic kitchen supplies such as a large sauce pot, large bowl, small pot, towels, knife, and a cutting board
Step 2: Prepare your cucumbers and onions
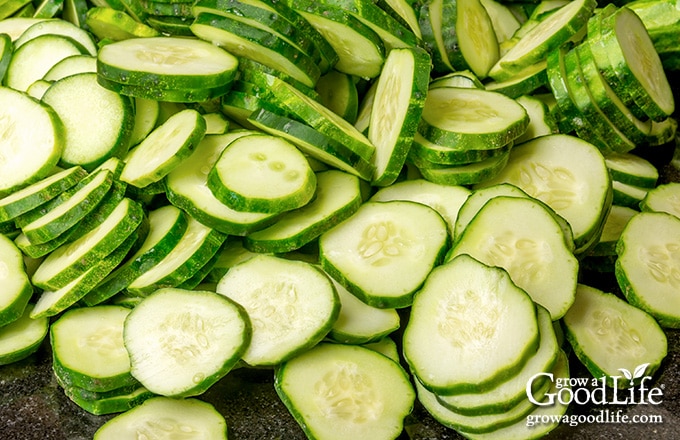
Wash cucumbers well under running water and cut into 1/4-inch slices discarding ends. Peel onion and slice thinly.
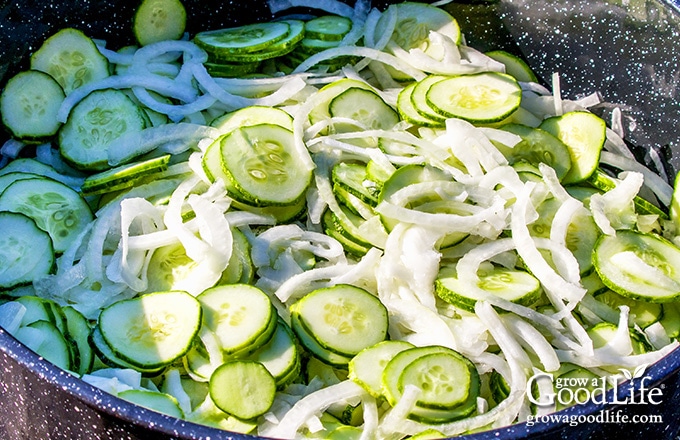
Combine the cucumber and onions a large bowl. Scatter the canning salt over the top, cover with the ice and water, and let stand for about 3 hours.
Step 3: Prepare your canning equipment
Wash your jars, lids, bands, and canning tools in warm, soapy water. Rinse well, and set the lids, bands, and tools aside to air dry until you are ready to use them.
Setup your water bath canner with the canning rack on a large burner of your stove. Place the jars upright in the canner, and add water to cover. Bring the canner to a simmer (180˚F) for 10 minutes, and keep the jars hot until you are ready to fill them.
Step 4: Make the pickling brine
In a large pot, combine sugar, mustard seed, celery seed, ground turmeric, peppercorns, and vinegar. Heat just to a boil.
Drain and rinse the cucumbers and onions under fresh water. Add the drained cucumber and onion slices to the pot of pickling brine and return to boil. Reduce heat and keep warm as you fill your jars.
Step 5: Can the pickles
Lay a kitchen towel on the counter. Use the jar lifter to remove a hot jar from the canner, drain, and place on the towel. Keep the remaining jars in the canner, so they stay warm.
Place the canning funnel on the jar, and add the warm pickles and brine to the jar, leaving 1/2-inch headspace. Run the bubble popper through the jar to release any trapped air bubbles. Make sure all the pickles are submerged under the brine. Remove any that stick out, and adjust the headspace again if needed.
Wipe the rim with a damp towel to remove residue. Center a lid on the jar, place the band over the lid, and screw it on until fingertip tight. Place the jar back into the canner, and repeat with the rest of the jars.
Adjust the water level so it is covering the jars by several inches, bring the pot to a boil, and process the jars for the times indicated in the recipe below.
Let the jars cool, test the seals, label and date the jars, and store the canned pickles in a cool, dark location. Let the pickles stand for about 4 weeks to develop flavor.
Granny's Bread and Butter Pickles Recipe
Ingredients
- 3 pounds pickling cucumbers
- 1 pound onions
- 1/4 cup canning or pickling salt
- 2 quarts crushed ice or ice cubes and water
- 1 cup sugar
- 1 tablespoon yellow mustard seed
- 1 teaspoon celery seed
- 1 teaspoon ground turmeric
- 1/2 teaspoon black peppercorn
- 3 cups apple cider vinegar 5% acidity (or white vinegar)
Instructions
Prepare your cucumbers and onions:
- Wash cucumbers, cut into 1/4-inch slices discarding ends. Peel and thinly slice onions. Combine sliced cucumber and onions a large bowl.
- Sprinkle canning salt over the top of the cucumbers and onions, cover with ice and water, and let stand for 3 hours.
Prepare your canning equipment:
- Wash your jars, lids, screw bands, and canning tools in hot soapy water. Rinse thoroughly to remove all suds. Set aside to air dry on a clean kitchen towel.
- Place the jar rack into water bath canner, place jars in the canner, and add water to cover. Bring the canner to a simmer (180˚F) for 10 minutes, and keep the jars hot.
Make your bread and butter pickles
- In a large pot, combine sugar, mustard seed, celery seed, ground turmeric, peppercorns, and vinegar. Heat just to a boil.
- Drain and rinse the cucumber and onions under fresh water. Add the drained cucumber and onion slices to the large pot and return to boil. Reduce heat and keep warm as you fill your jars.
Can your bread and butter pickles
- Spread a kitchen towel on the counter. Use the jar lifter to remove a hot jar from the canner, drain, and place on the towel. Keep the remaining jars in the canner, so they stay warm.
- Use your canning funnel and ladle to pack the hot cucumbers and onions loosely into the jar. Ladle the hot brine over the pickles, and maintaining a 1/2 inch headspace.
- Run the bubble popper through the jar to release any trapped air bubbles. Make sure all the pickles are submerged under the brine. Remove any that stick out, and adjust the headspace again if needed.
- Wipe the rim to remove any residue, center a lid on the jar, and screw on a band until it is fingertip tight. Use your jar lifter to place the jar back into the canner, and repeat with the remaining jars.
- Once all the jars are in canner, adjust the water level so it is 2 inches above the jar tops.
- Cover the canner and bring to boil over high heat. Once water boils vigorously, continue boiling and process pickles for 10 minutes at altitudes of less than 1,000 feet. Adjust processing time for your altitude if necessary (See Note).
- When processing time is complete, turn off heat, remove the cover, and allow the canner to cool down and settle for about 5 minutes.
- Spread a dry kitchen towel on the counter. Remove the cover by tilting lid away from you so that steam does not burn your face.
- Use the jar lifter to remove the jars from canner and place on the towel. Keep the jars upright, and don't tighten bands or check the seals yet. Let the jars sit undisturbed for 12 to 24-hours to cool.
- After 12 to 24-hours, check to be sure jar lids have sealed by pushing on the center of the lid. The lid should not pop up. If the lid flexes up and down, it did not seal. Refrigerate jar and use up within a week.
- Remove the screw on bands and wash the jars. Label and date the jars. Store in a cool, dark location. Allow 4-5 weeks for the pickles to develop their flavor. Use within a year. Yields about 5 pints depending on the size of your cucumbers.
Notes
Nutrition
This recipe was originally published July 5, 2015. It has been reviewed and updated with additional information and new photos.
If you know someone who doesn’t like pickles, let them taste these pickles. Granny’s Bread & Butter Pickles are so sweet that it may just convert them into a pickle lover too.
Canning Resources:
- USDA Complete Guide to Home Canning
- Ball Blue Book Guide to Preserving
- Storing Home Canned Goods – National Center for Home Preservation
- Causes and Possible Solutions for Problems with Canned Foods – National Center for Home Preservation
You May Also Like These Canning Recipes:
- Spiced Apple Jelly Recipe with No Added Pectin
- How to Can Carrots for Food Storage
- Homemade Applesauce for Canning
- Crabapple Jelly with No Added Pectin
- Seasoned Tomato Sauce for Home Canning
Good planning is key to a successful vegetable garden
Whether you are new to growing your own food or have been growing a vegetable garden for years, you will benefit from some planning each year. You will find everything you need to organize and plan your vegetable garden in my PDF eBook, Grow a Good Life Guide to Planning Your Vegetable Garden.


Can I use regular
Tcucumbers
Betty, Yes, you can use regular cucumbers.
Hi, I love this recipe but noticed after about 6 weeks the brine started to become cloudy and brownish. I did use pickling salt. The pickles smell fine. Do you think they’re okay to eat and is this normal?
Thank you!
Hi there, Kristen! It’s great to hear that you love the recipe. When pickling, it’s not unusual for the brine to change in color or become slightly cloudy over time. This can be due to natural reactions between the ingredients, and it doesn’t necessarily mean the pickles are unsafe to eat. As long as you followed the recipe, processed them properly, and the pickles still smell fine, they should be safe to consume.
how much pickling spice would be used as a substitute?
Shelly, You can use equal amounts of pickling spice for each ingredient you are substituting. Please keep in mind that pickling spice is a blend of various spices, so the flavor may have a slightly different profile compared to using each spice individually.
I am allergic to onions and celery can I safely omit them from the bread and butter pickles
Jim, Yes, you can safely omit onions and celery seeds from your bread and butter pickles if you’re allergic to them. These ingredients are added for flavor, so leaving them out won’t affect the safety of the canning recipe.
Why do you water bath pickles? I make sweet mustard pickles, but I have never water bath them, and they were always nice to eat.
Barb, All pickles and home-canned products can be subject to spoilage from microorganisms and enzymes. Processing pickles in a boiling water-bath canner prevents these issues and ensures shelf stability for your jars. While your sweet mustard pickles may have turned out fine without water bath canning in your experience, it’s important to note that canning guidelines exist to maintain safety standards. If you’re interested in canning your sweet mustard pickles for longer-term storage, I’d recommend following a trusted canning recipe to ensure safety.
can I just use pickling spice?
Barbara, Yes, you can.
Can you use white vinegar instead of apple cider vinegar
Yes, you can use any commercial vinegar with at least 5% acidity.
Is it possible to use a steam canner for this recipe?
Anna, Yes, you can use a steam canner for this recipe. Just be sure to follow the specific instructions for your steam canner model.
Would it be safe to add cloves to this recipe?
Lynne, Yes, you can include cloves with the rest of the pickling spices.
I just finished making this recipe and they smell just like my grandmas! I had a bit of an issue as I didn’t have enough brine for 5 jars, I hardly had enough for 4. I panicked and just decided to add more vinegar and water to the brine to finish the last jar. The leftovers are in the fridge and they seem fine. What would you suggest if this happens again?
Sarah, I’m glad to hear that the pickles smell like your grandma’s! I am sorry you had some issues with the proportion of brine to cucumbers. If you encounter a similar issue with the brine quantity in the future, try to pack the cucumbers and onions in a bit tighter, or you can quickly heat extra vinegar to top off the remaining jar.