Homemade Flour Tortilla Recipe
This post may contain affiliate links, which means that I may receive a commission if you make a purchase using these links. As an Amazon Associate I earn from qualifying purchases.
Only four basic ingredients are needed for this flour tortilla recipe. Making homemade tortillas is worth the extra effort because they taste so much better than store bought tortillas. Try this simple flour tortilla recipe and you will know exactly what ingredients you and your family will be eating.
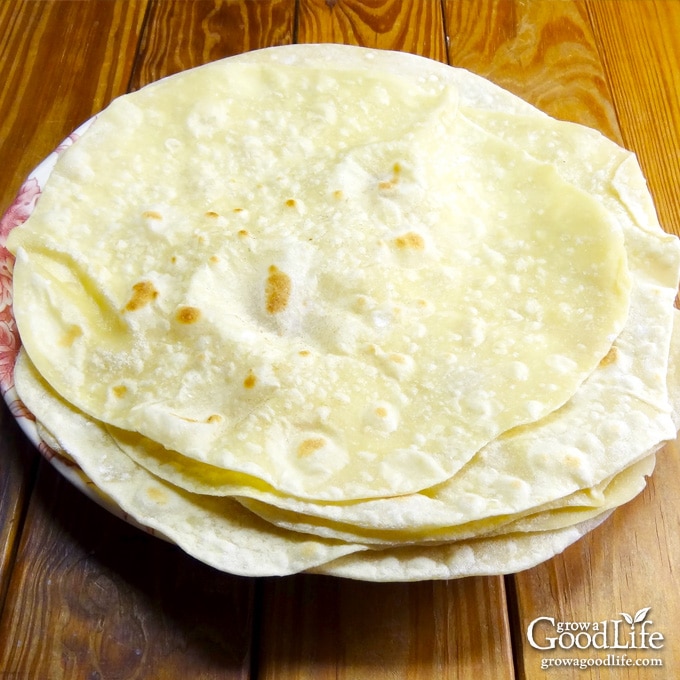
With all the Anaheim and Jalapeño peppers in the garden this year, I know I am going to be sharing several of our favorite Mexican inspired recipes. I wanted to be sure to include my go-to flour tortilla recipe.
We use these homemade tortillas for many things from fajitas, sandwiches, breakfast burritos, enchiladas, quesadillas, and soft tacos to simply wrapping up a salad for an easy to eat lunch when we are on the go.
Tips for Making Flour Tortillas
Making great flour tortillas is not as complicated as it may seem. The key to a perfect, light, and airy tortilla is having the right ingredients and technique.
Ingredients
The ingredients used to make flour tortillas are simple, basic pantry items: Flour, salt, water, and cooking fat.
Flour: This recipe uses unbleached all-purpose flour for a soft, pliable flour tortilla. However, you can use other types of flours with some slight adjustments:
- Whole Wheat Flour Tortillas: Using spelt or white whole-wheat flour will give your tortillas a nutty and slightly sweet flavor. Add an extra 2-3 tablespoons of water for softer dough. Also let the dough rest for up to 30 minutes to hydrate the flour, develop the gluten, and make the tortillas easier to roll. The tortillas will be less puffy and slightly denser than using regular flour, so be sure to roll them nice and thin before browning.
- Gluten Free Flour Tortillas: Replace the all-purpose flour with 1 3/4 cups rice flour, 1/4 cup tapioca starch, and add 1 teaspoon xanthan gum. You’ll need to adjust the water slightly to get a pliable dough that is easy to roll.
Salt: The salt is simply added for flavor and can be left out if you are watching your sodium. I use kosher salt or Himalayan salt in my kitchen, but any table salt will be fine.
Hot Water: Warm water helps to distribute the cooking fat evenly through the dough, and hydrates the flour quicker. Heat water briefly in a teapot or in the microwave. You want it warm to the touch, but not boiling.
Cooking Fat: I tend to use avocado oil because it is easy. I always have it in my pantry and it combines effortlessly with the other ingredients. You can also use use extra-virgin olive oil or vegetable oil in the same way.
Traditional flour tortillas are made using lard. Lard is rendered back fat or leaf fat from pigs. It’s rather difficult to find in my area, and I am not likely to render my own very often. Vegetable shortening or butter can be used in place of lard. Bacon fat works too, but adds a rich, bacon-y flavor that can overpower depending on how you are using the flour tortilla.
Mixing the Dough
This recipe uses a food processor to make the tortilla dough, but you can also make it with a stand mixer or mix by hand.
If you are using lard instead of oil, add it before the water and mix until it is evenly incorporated into the flour, and then trickle in the hot water until a dough ball forms.
- Food processor makes it easy to create the dough quickly, simply add the dry ingredients to the bowl, pulse to combine. Then turn on the blending setting and drizzle in the water and oil mixture while the food processor is running until the until the dough forms a ball. This happens pretty quickly.
- Stand Mixer with paddle attachment makes quick work of combining the ingredients and kneading the dough for tortillas. First add the flour and salt to the bowl of a stand mixer, and mix on low speed until combined. Turn the mixer to medium, drizzle in the water and oil, and mix until the dough begins to form a ball.
- Mix by Hand: If mixing by hand, add the dry ingredients to a large bowl and stir to combine. Add the oil or lard and mix until distributed evenly, and then add the water a little at a time while mixing until the dough comes together. Turn the dough out onto a well-floured surface and knead for 5 minutes.
Let the Dough Rest
After the dough is kneaded, it is important to let it rest for at least 15 minutes before rolling. This rest period allows the gluten to develop resulting in more pliable dough that will be easier to roll. After mixing, transfer dough to a floured work surface. Cover with a clean kitchen towel to prevent it from drying out, and let the dough rest.
If you find your dough springing back as you roll it, it is too elastic and needs more time to rest. Simply cover it with a towel and let it rest 5 minutes longer.
Rolling the Tortilla
Rolling a perfect round tortilla takes practice. More importantly is that you roll the dough thin so it cooks evenly.
After letting the dough rest, and before rolling the tortillas, you will divide the dough into eight even sized wedges. Then you will roll each piece into a smooth ball with a rolling pin.
Working with one dough ball at a time, place it in the center of your floured work surface, and flatten it into a round disk with the palm of your hand. Dust the rolling pin well with flour and place it in the center of the dough. Press firmly, and roll from the center away from you. Lift the dough, turn it, and continue rolling from the center into a circle.
Dust with flour as needed to prevent sticking. Keep turning the dough to roll the tortilla evenly. You are aiming for an 8 or 9-inch circle, which will make the dough about 1/16 inch thick, thin enough to see your hand through the opaque dough.
Use a Hot Skillet
Make sure to preheat your pan or griddle to medium-high heat, and that it is hot before browning your first tortilla. If you place your tortilla on a cold skillet, it will cook too slowly, dry out, and stiffen up instead of remaining pliable. If you end up with a stiff tortilla, break it up and use it for dipping into homemade salsa.
Steps for Making Flour Tortillas
A full printable recipe can be found at the bottom of the article, but here are the illustrated steps for making flour tortillas from scratch:
Step 1: Prepare the Tortilla Dough
In a food processor, combine flour and salt by pulsing several times. Combine the oil and water and drizzle it in slowly while the food processor is running. Process until the dough comes together and forms a ball.
Turn the dough onto a floured work surface and knead several times until the dough is smooth. Add flour if the dough is too wet, and extra water if dry. Form the dough into a ball, cover with a clean kitchen towel, and let it rest for at least 15 minutes..
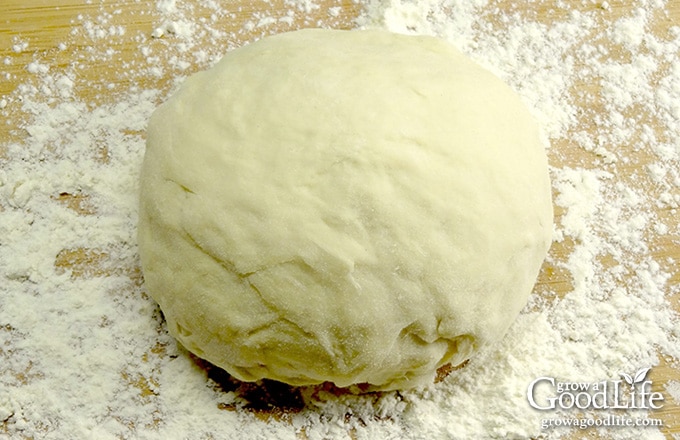
Step 2: Roll Out Your Tortillas
When you are ready to roll your tortillas, preheat your pan, divide the dough into eight portions, and roll into balls.
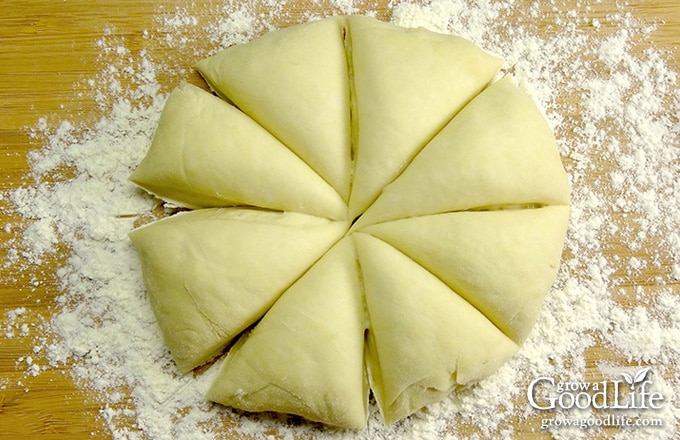
Work with one tortilla at a time. Sprinkle flour on your work surface and rolling pin. Flatten one dough ball with the palm of your hand, and use the rolling pin to roll each ball into an 8 or 9-inch circle. Dust with extra flour as needed to prevent the dough from sticking. Cover the dough balls in between rolling to prevent them from drying out.
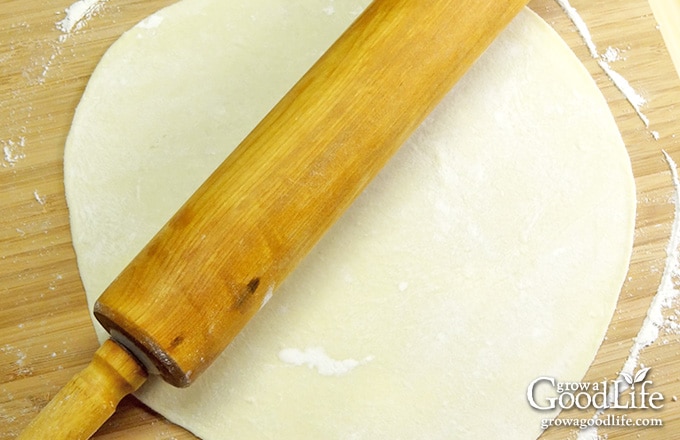
Step 3: Cook the Tortillas
Cook the tortilla in a pre-heated, dry skillet. Once the tortilla hits the pan, it should begin puffing up with air bubbles. The tortilla is ready to flip when it is puffy and develops golden brown spots. Flip and cook on the other side until it is puffy and browns in spots. Place the cooked tortilla on a plate, and cover with a towel to keep warm. Repeat until all the tortillas are cooked. That’s it! It should take about a half an hour, and you’ll have fresh homemade tortillas.
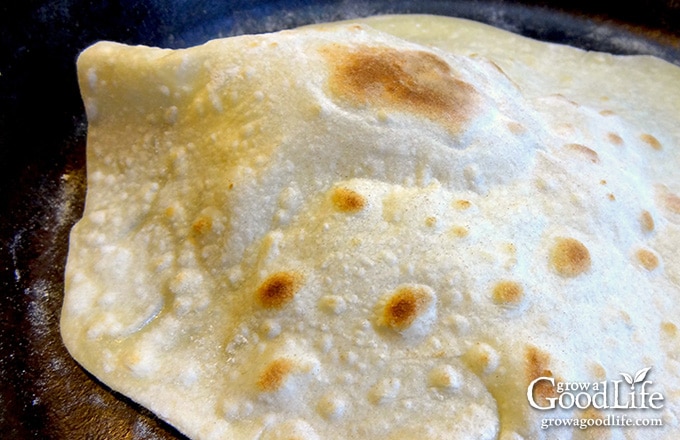
If your tortillas feel stiff after cooking instead of pliable, your pan may not have been hot enough, or you may have cooked them too long. Adjust the temperature if necessary, and only cook until puffy with light brown spots. If you find extra flour collecting in the pan, remove it with a damp paper towel, or it may add a burnt flour flavor to your tortillas.
How to Store Flour Tortillas
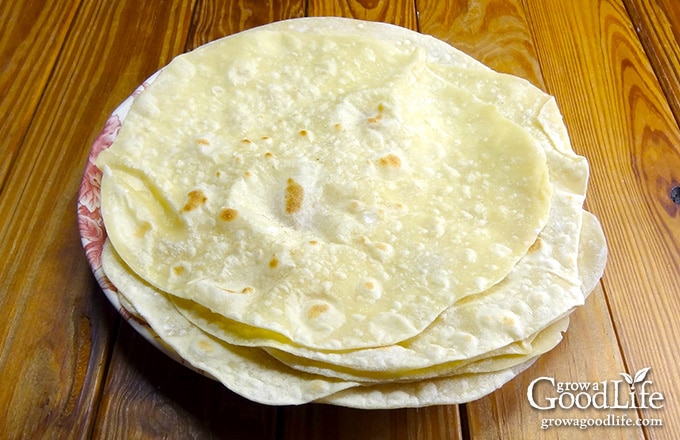
Store extra tortillas in a zipper bag at room temperature for 24 hours, refrigerate up to a week, or freeze for longer storage.
- To refrigerate, place the tortillas in a zipper bag and store in the refrigerator for about one week. Warm the tortillas before using.
- Freeze the flour tortillas for longer storage. Layer the tortillas on baking sheets and freeze. Once solid, stack the frozen flour tortillas, place in a freezer zipper bag, and store flat in the freezer for up to 6 months.
Warm the tortillas before serving by reheating individually in a hot skillet, wrapped in foil in a warm oven, or wrapped with damp paper towels in the microwave. Thaw the frozen tortillas, and then warm before serving.
Homemade Flour Tortillas Recipe
Ingredients
- 2 cups unbleached all-purpose flour plus extra for kneading and dusting
- 1/2 teaspoon kosher salt
- 3/4 cup hot water
- 3 tablespoons avocado oil extra virgin olive oil, lard or butter softened
Instructions
- Add flour and salt to the bowl of a food processor. Pulse to combine.
- Combine the oil and water together.
- Turn on the blending mode and drizzle in the water and oil while the food processor is running.
- Continue to process until the dough comes together and forms a ball.
- Turn the dough onto a floured surface and knead several times until the dough is smooth. Add extra flour or water if necessary.
- Form the dough into a ball, cover with a towel, and let it rest for 15 minutes.
- Preheat a cast-iron skillet, griddle, or frying pan over medium heat.
- Divide the dough into eight portions and roll into balls.
- On a lightly floured surface, flatten the ball and use a rolling pin to roll each ball into an 8 to 9-inch circle. Sprinkle with flour as needed to prevent sticking.
- In the preheated skillet, cook tortillas over medium heat for about 30 to 45 seconds on each side or until you see some light brown spots, and the tortilla is puffy.
- Transfer the tortillas to a plate and cover with a clean towel to keep warm. Yield: 8 tortillas.
Nutrition
You May Also Like:
- Chicken Enchiladas with Roasted Green Chile Sauce
- Chili Lime Beef-Steak Fajitas Recipe
- Homemade Taco Seasoning
- Chili-Lime Chicken Fajitas
Good planning is key to a successful vegetable garden
Whether you are new to growing your own food or have been growing a vegetable garden for years, you will benefit from some planning each year. You will find everything you need to organize and plan your vegetable garden in my PDF eBook, Grow a Good Life Guide to Planning Your Vegetable Garden.


Thank you for sharing this recipe!! I had been making tortillas with a store-bought “flour tortilla mix” and your recipe is much better!! Tortillas are light and fluffy! With ONLY 4 ingredients!!! I kneaded by hand. Thank you!
Margie, I am so glad you liked the recipe. Thanks for letting me know!
These look so soft and delicious!
I made this recipe for the first time last night! AMAZING! I told my husband we’re having tacos again tonight for supper just because of these tortillias! Yummy!
Hello – I’m afraid I don’t have a cast iron pan. Will a non-stick pan be OK? And you cook them dry, with no fat in the pan, correct?
Karen, Yes, a non-stick will be ok. And yes, cook dry, no need to add anything to the pan. I hope you enjoy your tortillas 🙂
Many thanks!
Hello, as a New Mexican living in Australia,what a gift this recipe is. My 13 year old grandson found your recipe and made the best tortillas. He didn’t measure. We used the only fry pan we had and it was just fine. I tried w/ melted butter and they were yucky.We will use your recipe and now we have tortillas! Thank you so so so much!
Hello from a fellow New Mexican. Thanks for leaving a review. If someone from New Mexico says they are good they must be good!
Thank you so much for this recipe. I made these tonight and we love them! So glad I decided to use your recipe. It was using the food processor and the few ingredients that made me try your recipe first. This is THE tortilla recipe for this household. Can’t wait to try your other recipes.
Hi, may I know 1 cup of flour is how many grams?
Thanks in advance.
Ben, It depends on the type of flour, but 1 cup of unbleached all-purpose flour is approximately 120 grams. 240 grams for this recipe. Here is a great conversion chart from King Arthur Flour: https://www.kingarthurflour.com/learn/ingredient-weight-chart.html
These are the Best Ever,so easy and good.Thank you so much for sharing!
I like the taste of the tortillas, but they shrink after I’ve rolled or pressed them. As soon as I take them off the rolling board or press, they shrink and thicken, and I have to stretch them like pizza dough.
Is there anything I can do to remedy this? I Kneed them by hand for about five minutes because I don’t have a dough attachment on my food processor. Any suggestions would be appreciated. Thanks for the recipe!
D, if the dough springs back, you may need to let it rest a little longer.
Hi there, I just wanted to say thank you so much for sharing your lovely recipe with us. I made this the other night and was amazed at how simple & delicious it was. You’re right, it tastes so much better than store-bought! Recently I’ve been more conscious of the additives and ingredients in the foods I buy, and was shocked to find that all of the tortillas available in my local stores have long ingredient lists filled with strange preservatives, etc. And a homemade one is just 4 simple ingredients!
Omg!!!! I just made these…they are amazing Rachel!!! THANK YOU for sharing this super easy and delicious recipe!!!! Let me tell you, I hate baking and always fail making any type of baking…but your instructions and suggestions were so easy to follow! I did everything as you wrote: flour, salt and added my water+oil very slowly while the bread machine was going. Once it was done mixing my dough for me…I let it rest 15 min and then rolled out my tortillas. They were so soft and fluffed up even more while I was frying them…omg! I can not believe that I actually made this! It turned out fabulous and soooo good! It almost didn’t make it to the table cause I was eating them as I was making them…amazing!!!! Thank you…I will never buy them from the store again….this is spectacular!!! I mean YUMMMMM!!!!
I am so glad you enjoyed the recipe, Iryna! Thank you for your comment. You made my day! 🙂
I’ve found it so difficult to roll the dough ball with the rolling pin. It scatters like a real mess. Can you suggest me any other product to make the dough into a perfect well-shaped tortilla? Thanks in Advance 🙂
I’m sorry, I don’t understand what you mean by, “scatters.” Is the dough not holding together? If so, the dough is too dry. Add some water a teaspoon at a time and knead until you get a smooth ball. A rolling pin is really all you need for flour tortillas.
I meant that the dough was not flattening in round shape. Thanks
It’s true that when rolling out the dough it will take on a strange shape that’s not always round. If you want your tortillas to be a perfect circle shape like store-bought ones, what you can do is roll them out to be thin. Then, if you have a silicone baking mat with diameters printed on it, you can use a knife or pizza roller to gently cut out a circle shape. The only downside to this is that you’ll have some excess dough left over, but you can try to take the leftovers and roll them into a smaller tortilla in the end.