How to Grow Spinach
This post may contain affiliate links, which means that I may receive a commission if you make a purchase using these links. As an Amazon Associate I earn from qualifying purchases.
There’s nothing more delicious than fresh, tender spinach harvested straight from the garden. Learn how to grow spinach with this ultimate guide.
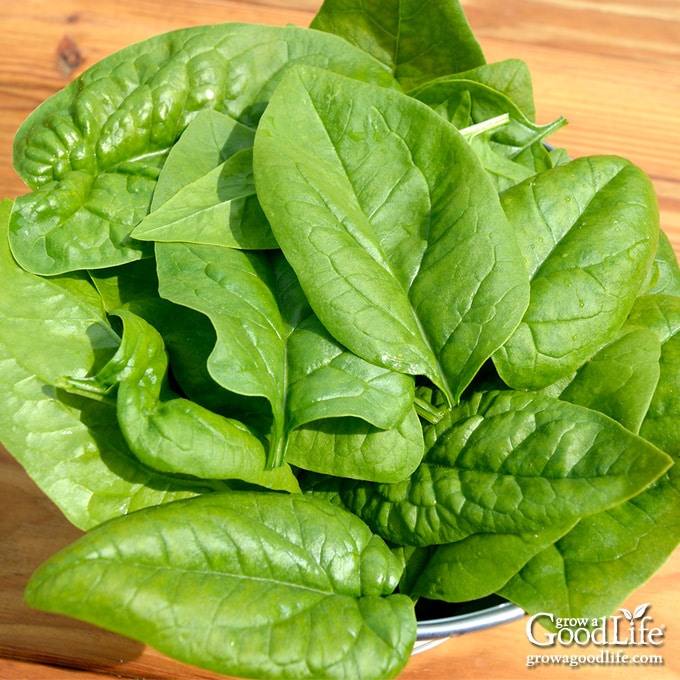
Spinach is a versatile leafy green vegetable that can be enjoyed in so many ways, including raw in salads, simmered in soups, and sautéed as a side dish. It’s easy to grow and doesn’t need much care, making it an excellent option for beginners.
Spinach is a fast-growing crop that tastes delicious and is packed with vitamins and minerals making it beloved by gardeners of all skill levels. Follow these simple tips and tricks to learn how to grow spinach in your garden, in containers, and even indoors.
About Spinach
Spinach (Spinacia oleracea) is a cool-season crop that thrives in spring and fall. It has thick leaves that may be smooth or crinkled, depending on the variety. While we believe spinach originated in central and western Asia, where it grows native, but is now found in gardens in nearly every part of the world.
If you’re familiar with growing lettuce, then growing spinach will be a piece of cake. As a fellow cool-season crop, spinach shares similar growing requirements as lettuce. In addition, spinach is rich in many vitamins, including A, B, C, and K, not to mention that spinach is also a rich source of calcium and iron.
Types of Spinach to Consider Growing
In seed catalogs, spinach is sometimes divided into five categories based on its leaf types. You will surely find several types that work for your garden with so many varieties available.
Some varieties are slower to bolt or go to seed, making them ideal for spring planting, while others are better suited for fall planting. Some can even tolerate a little summer heat as long as the plants receive plenty of moisture during hot spells, while others can be overwintered with some cold protection.
Savoy-Leaf Spinach
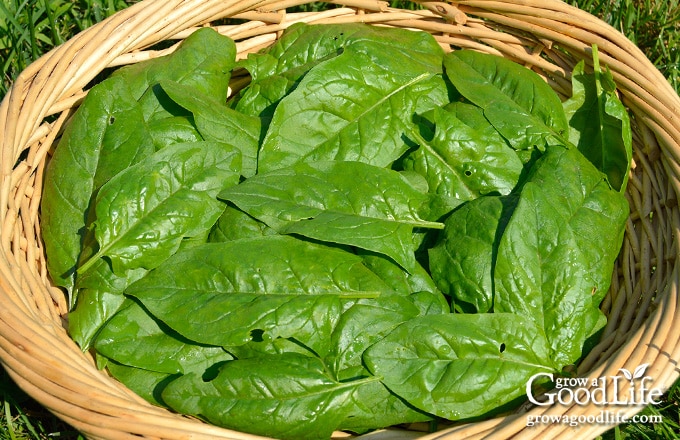
Savoy spinach, also called curly-leaf spinach, is the spinach bunches you usually see at the grocery store. These varieties have large, thick, and crinkled textured leaves that grow low to the ground.
While the thick ruffled leaves may be a little more challenging to clean, savoyed-leaf varieties are very productive and grow large foliage with a bold and slightly bitter flavor that is ideal for cooking. The plants also are slow to bolt and tolerate cold temperatures better than others.
Savoy spinach varieties include Bloomsdale, Hammerhead, and Melody.
Semi-Savoy Spinach
Semi-savory spinach types have foliage that isn’t as deeply crinkled as savoy varieties. The plants have a more upright growth that makes mud splashes less likely, and since the leaves aren’t as puckered, so they are easier to wash. They also tend to have better disease resistance and are more bolt resistant.
Types of semi-savoy spinach include Acadia, Avon, Catalina, Emperor, Giant Winter, Tundra, and Tyee.
Smooth-Leaf Spinach
Smooth or flat-leafed spinach is the type often sold in spring salad mixes and baby spinach in supermarkets. Flat-leafed varieties have smooth foliage that is easy to harvest and clean. The leaves have a more tender texture and slightly sweeter flavor than the savoy varieties. Smooth-leaf types are delicious raw in salads.
Flat-leafed spinach varieties include Corvair, Lakeside, Olympia, Renegade, Seaside, Space, and Teton.
Arrowhead Spinach
Asian leaf spinach is also referred to as arrowhead spinach and produces leaves in the shape of an arrowhead. The upright growth habit helps keep the foliage away from the ground making it less prone to soil splashing and slugs. In addition, the mild-flavored, succulent leaves can withstand extreme temperatures without bolting.
Arrowhead spinach varieties include Flamingo, Improved, Imperial Star, Olympia, Okame, Regiment, and Summer Delight.
Red Veined Spinach
Red-veined spinach varieties feature attractive, dark green leaves with a red stem and veins. Most have an upright growth habit that helps keep the foliage clean. Types include Beaujolais, Bourdeaux, Red Cardinal, Red Kitten, and Red Tabby.
Spinach Alternatives
Some plants also have spinach in their name but are not in the same botanical family. However, they can often be used similarly and substituted for spinach in raw and cooked recipes.
Examples include Chinese spinach amaranth (Amaranthus gangeticus), Malabar spinach (Basella alba), New Zealand spinach (Tetragonia tetragonioides), and water spinach (Ipomoea aquatica).
Tips for Growing Spinach
Spinach can be harvested early as baby greens in as little as 30 days or left longer to mature fully. Follow these tips to learn how to grow spinach in your garden, containers, and even indoors.
When to Grow Spinach
Spinach is a cool-season crop, meaning it grows best with cool weather and a short day length, making it an ideal crop to grow during the spring and fall seasons.
The time to start your seeds will depend on your last frost date. You can find your estimated frost dates by contacting your local extension office or entering your zip code here at PlantMaps.com.
You can start sowing seeds in early spring after the danger of heavy frost is past, or you can start seeds early indoors under lights, and transplant hardened-off seedlings to the garden once the soil warms.
Spinach can also be grown for a fall harvest. For a fall crop, you can direct sow seeds in late summer or start seeds indoors under lights and transplant them to the garden once the temperatures cool down in fall. You should be able to enjoy a harvest of spinach just in time before the winter frost rolls in.
Don’t try to grow spinach in summer, even in the shade. Spinach is triggered to bolt or goes to seed once temperatures warm, and daylight increases to 14 hours in summer.
A sign of bolting is when your spinach sends out a tall flower stalk from the center of the plant. Once spinach bolts, the flavor will turn bitter as the plant shifts from producing greens to seeds. Therefore, it is best to pull the plants and sow something else in its place, such as bush beans, zucchini, or carrots.
How to Prepare the Garden Bed
Spinach grows best in loamy, well-draining soil in full sun or partial shade. When selecting a planting location for spring, choose one that gets 6 or more hours of direct sun each day. If you are planting in late summer for a fall crop, try to find an area with sun in the morning and partial shade in the afternoon.
Spinach thrives in soil rich in organic material, so make sure to work in plenty of mature compost to give your spinach plenty of nourishment as it grows. Also, aim for neutral soil with a pH between 6.5 to 7.0.
Prepare the growing bed by removing all weeds and leftover plant debris. Next, amend the soil by adding several inches of finished compost and working it in about 6-inches deep. If the weather has been dry, prepare and water the bed well the day before you sow seeds or transplant seedlings.
How to Plant Spinach
Spinach seeds can be sowed directly in the garden or started indoors and transplanted for an earlier harvest. Seeds take about 7 to 10 days to sprout and germinate best at a soil temperature between 55 to 65˚F.
Starting Spinach Seeds Indoors
Start seeds indoors 6 weeks before your average last frost date for a spring harvest and about 8 weeks before the average first frost date for a fall crop.
Fill your seed starter containers with damp seed starting mix to within 1/2 inch of the top of the container. Sow several seeds on top of the soil, then cover with a light dusting of the potting mix.
Mist the soil surface with water, and cover the containers with a humidity dome to retain moisture. Place the trays in a warm location or use a seedling heat mat. The seeds will sprout in 7 to 10 days.
Once the seeds sprout, remove the tray from heat and place the seedlings under grow lights. Position the lights so they are about 2-inches above the tray. You can use a south-facing window if you don’t have grow lights. Spinach should receive 6 to 12 hours of sun or artificial light daily.
When your spinach seedlings are large enough to pop right out of their container easily, they are ready to be transplanted to their final destination. Be sure to harden off your seedlings and transplant them outdoors once the soil warms, and after all danger of heavy frost is past.
Transplanting Seedings
If you grow seedlings indoors or purchase transplants from a warm greenhouse, hardening them off before planting will help them adjust to the new environment outdoors.
After your seedlings are hardened off, they are ready to be transplanted into their permanent location in the garden. Prepare your garden beds ahead of time. If the weather has been dry, water the bed thoroughly the day before you plant. Also, water your seedlings, so the roots are well hydrated.
Choose a cloudy day with no wind and transplant in the late afternoon or evening to give your plants time to adjust without the additional challenge of the sun.
Check the seed package for the recommended space required for the variety of spinach you are growing, and dig your holes.
Remove the seedlings from the container, place them in the holes, and lightly firm the soil around the plants. Water well after planting, and keep the soil damp until the plants become established. Properly hardened off plants will not be harmed by light frosts.
Direct Sowing Seeds
Direct sow seeds in early spring after the danger of heavy frost is past and the ground has dried. Seeds may germinate if the soil temperature is at least 40˚F, but the ideal soil temperature is between 55 to 65˚F.
Prepare the garden ahead of time, and sow your seeds in shallow, damp soil, about 1/2-inch deep, 2 inches apart, in rows that are spaced 12 to 18 inches apart. Lightly cover with soil, water gently, and keep the soil evenly moist until the seeds sprout and become established.
The seeds will germinate in 7 to 10 days, depending on the variety and soil temperature. When your spinach plants reach 2 inches in height, thin these seedlings until they are 3 to 4 inches apart.
Succession Planting
Instead of planting all your spinach at the same time, you can space out the harvest by succession planting. With this method, you will have a new crop every few weeks instead of all of your spinach maturing simultaneously.
To succession plant spinach, you can stagger the harvest by sowing a round of seeds every 2 to 3 weeks, so the plants are ready in stages. Another way is to plant varieties that mature at different times.
If you love baby spinach greens, continue sowing spinach seeds every 2 weeks for a continuous harvest until the weather warms and the day length reaches 14 hours.
Then, begin sowing spinach again in late summer for fall harvests starting about 10 weeks before your first fall frost date. Succession sow every 2 weeks up to your area’s last expected frost date.
How to Care for the Plants
Spinach requires very little maintenance once the plants are established, but here are tips to keep your plants healthy and growing.
Watering
Spinach plants thrive a soil that is moist but not soggy. Spinach needs about 1-inch of water per week to grow rapidly. Keeping the ground damp creates a cool environment that prevents sudden bolting and maintains the quality of the foliage.
Check the soil moisture once a week by poking your finger in the soil about 1-inch deep. If the soil is dry, give your plants a good watering. Water your plants in the morning or early afternoon. Avoid wetting the leaves, as this will open them up to the possibility of fungal disease. Instead, use drip irrigation, a soaker hose, or water by hand to deliver water to the base of the plants.
Mulching the Soil
Spinach plants thrive on cool temperatures, and a sudden heat wave can disrupt your plant’s growth cycle. Mulching will minimize temperature swings and protect the roots from getting too hot and ruining your crop.
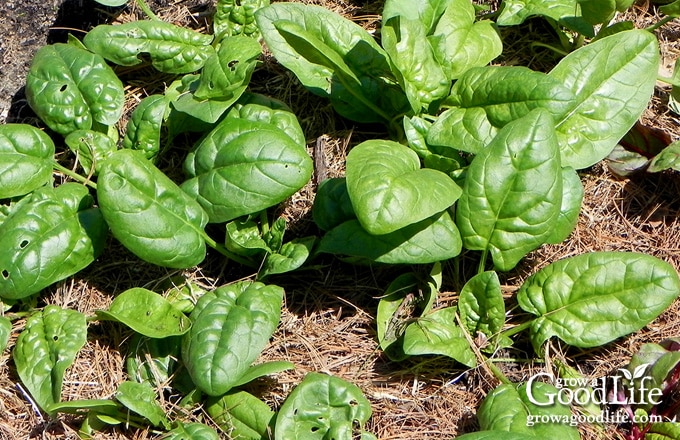
A layer of organic mulch will provide a barrier to help keep the soil cool, retain moisture, and prevent weeds from sprouting. Add several inches of straw or shredded leaves to the garden bed, keeping it a few inches away from the plants. Learn more about how organic mulch helps your garden.
Weeding
While a layer of mulch helps control weeds, some will manage to sprout. Therefore, the spinach beds should be weeded regularly, especially in the early stage of growth, so that the weeds won’t compete with the spinach for moisture and nutrients. Once the plants mature, their leafy canopy helps shade the soil, preventing weed seeds from sprouting.
Carefully weed around your plants by hand. Keep in mind that spinach has shallow roots that damage easily. Pull weeds when the soil is moist to help the roots slide right out of the ground. Check out this article for more tips for controlling weeds in the garden.
Fertilizing
If you worked in a good amount of compost when you prepared the garden beds for planting, you might not need to add any additional fertilizer. However, if your plants are struggling, give them a boost by watering with organic liquid fertilizer, such as fish fertilizer or compost tea. Follow the mixing instructions on the bottle, and apply to the ground at the base of the plants.
Additionally, you can feed your plants with an organic nitrogen fertilizer part way through the growing cycle. Nitrogen will help encourage healthy green foliage. Side dress the plants with composted chicken or poultry manure, or use an organic nitrogen fertilizer such as blood meal or feather meal. Follow the directions on the fertilizer package to avoid accidentally damaging your plants.
Troubleshooting Growing Problems
Spinach doesn’t have many serious pest and disease issues, although aphids, cabbage worms, flea beetles, leaf miners, and slugs are common. Trim and destroy affected leaves. Covering the plants with a floating row cover can control most flying pests.
Although I highly recommend mulching plants, the mulch tends to provide an excellent hiding place for slugs. Consider using shallow containers filled with beer or homemade slug bait to reduce the population. To make a slug bait, mix 1 cup of water, 1/4 cup of sugar, and 1 teaspoon of yeast. Place the containers in the ground about 3 feet apart, and empty frequently.
Fungal diseases, such as downy mildew and white rust, can infect your plants in humid conditions, with wet foliage and a lack of air circulation. To reduce fungal problems, grow hybrids that are resistant to fungal diseases, maintain healthy soil, thin plants to improve air circulation, practice good sanitation, rotate your crops, and avoid growing spinach where beets or chard were in the previous season. These crops are closely related to spinach and are affected by the same pests and soil-borne diseases.
Best Companion Plants For Spinach
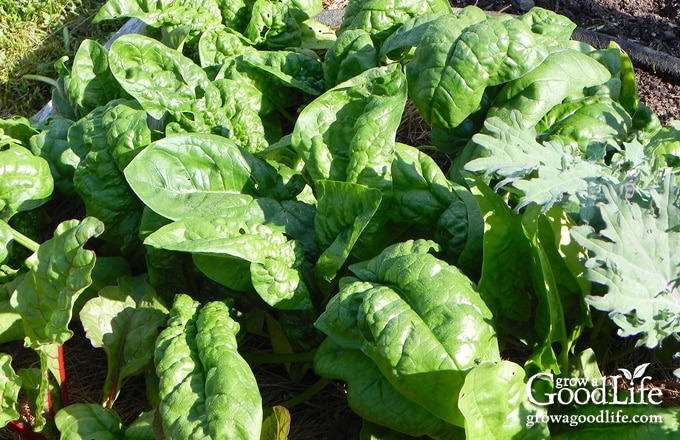
Spinach is a great companion plant to grow with other leafy greens such as lettuce, kale, and Swiss chard. It also does well with other cool-season crops such as beets, broccoli, cabbage, carrots, cauliflower, and radishes.
Some gardeners like to grow radish plants between the rows of spinach to help deter leaf miners. Leaf miners will eat the radish greens instead of your spinach, protecting your crop. And you can still enjoy an excellent radish harvest without their tops.
Growing Spinach in Containers
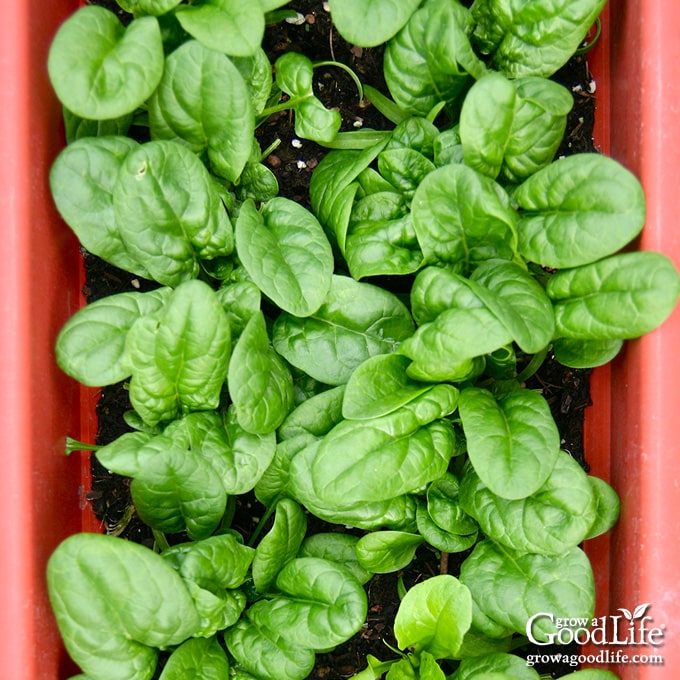
Spinach is a popular vegetable to grow in containers because of its ease of care and prolific yields. In addition, the shallow root system makes it an excellent choice for various containers, including tubs, barrels, pots, and even window boxes.
Choose containers at least 6-inches deep and hold 1 to 3 gallons of potting mix. Larger pots are also a great choice if you want to grow a lot of spinach or interplant with other crops.
Use a good quality potting mix suitable for growing vegetables in containers. Mix in a balanced slow-release organic fertilizer if your potting soil doesn’t contain fertilizer. Hydrate the soil by letting it soak for several hours, and then fill the containers once the soil is evenly damp.
Sow seeds or transplant seedlings and water well. Keep the soil evenly moist until the plants become established, and then let the soil dry out a bit in between, watering only when the top inch of soil is dry.
A feeding every 2 weeks with a balanced organic liquid fertilizer such as fish and seaweed emulsion will keep your plants nourished. Thin and harvest your spinach once the leaves reach a usable size, and sow more seeds every 2 weeks.
Growing Spinach Indoors
Growing spinach indoors allows you to enjoy the benefits of this leafy green crop year-round, no matter what the weather is like outside.
Select pots about 6 to 8-inches deep, fill with a damp potting mix appropriate for containers, mix in a balanced slow-release organic fertilizer, and sow your seeds.
Place the pots in a warm location until the seeds sprout, then move them under lights. Since spinach is day-length sensitive, keep the lights on for up to 12 hours and no longer than 14 hours, or the plants will be triggered to bolt or go to seed prematurely.
Water the plants regularly, thin as needed, and wait until the leaves are big enough to harvest.
Harvesting Spinach
You can begin to harvest your spinach as soon as it has developed a significant amount of leaves. Harvesting spinach when it is still relatively young will yield the best-tasting, more tender leaves. Overgrown spinach tends to taste bitter.
Baby spinach is ready to harvest in about 30 days, or you can let the plants grow larger. Harvest baby spinach once the plant has formed a rosette of at least 5 to 6 leaves. Clip a few leaves from each plant as needed, and then let the plant grow more foliage for a later harvest.
Harvest mature plants by cutting at the soil level or snipping individual leaves from the outside of the plant, allowing the plants to continue to produce from the center.
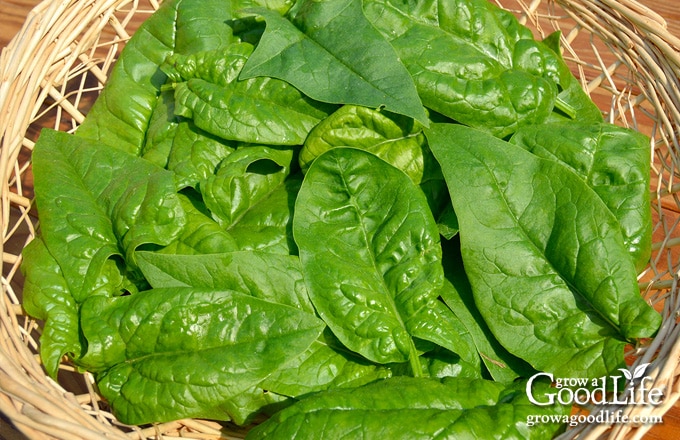
Always handle your spinach leaves with care. Damaging or bruising your leaves can cause them to deteriorate faster. For this reason, it is also recommended not to wash your harvested spinach until it’s time to use it.
To wash your spinach, fill a bowl with cool water and dunk your spinach under the water, and drain. Repeat until the water is clear with no signs of dirt or debris. Dry off your spinach by laying it on a towel or using a salad spinner.
To store spinach, let the leaves dry thoroughly, then wrap in a paper towel and place in a zipper bag. Store in the refrigerator crisper drawer for up to 10 days. Enjoy spinach raw in salads, simmered in soups, or sautéed with olive oil and garlic.
How to Preserve Spinach
If you have more spinach than you know what to do with, then don’t worry about letting it go to waste! A surplus of spinach can be frozen, canned, or dried for later use.
- How to Freeze Spinach: Rinse thoroughly and trim off any thick stems. Blanch in boiling water for 2 minutes, and then place in ice water to cool. Squeeze to remove as much water as you can. Divide into serving sizes, package to freezer containers leaving about 1/2-inch of space for expansion, and store in the freezer for up to 6 months.
- Canning Spinach: Large leaves hold up better to the canning process. Follow the pressure canning procedure at the National Center for Home Food Preservation.
- Dehydrated Spinach: Use a food dehydrator to dry the spinach. Wash the spinach well, and place it in a single layer on the drying screens. Dehydrate at 125˚F until dry, about 4 to 6 hours. Leave whole, or turn it into spinach powder using a food processor or blender. Store in airtight containers in a cool, dark location.
Preserved spinach can be added to smoothies, pureed into dips, and included in any cooked recipe that calls for spinach, such as quiche, pasta, soups, and stews.
—
I hope this guide helps you to see how easy it is to grow your own spinach at home. There’s nothing more delicious than fresh, tender spinach from the garden, and I am sure you’ll agree after growing your own!
You May Also Like:
- Over 30 Vegetables that Grow in Partial Shade
- 13 Quick Growing Crops for Fall
- 10 Vegetable Gardening Tips for Beginners
Good planning is key to a successful vegetable garden
Whether you are new to growing your own food or have been growing a vegetable garden for years, you will benefit from some planning each year. You will find everything you need to organize and plan your vegetable garden in my PDF eBook, Grow a Good Life Guide to Planning Your Vegetable Garden.

